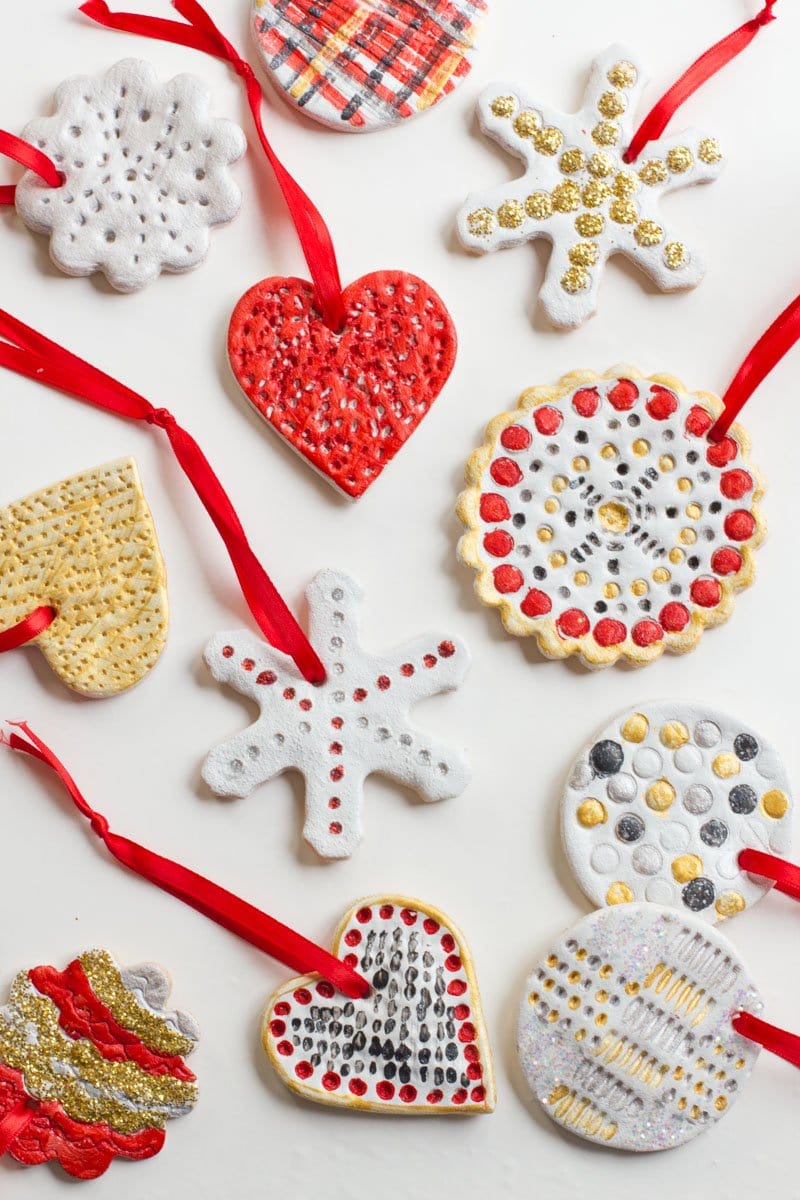
One of our favorite kid craft projects in our house—especially around the holidays—is homemade salt dough! My kid loves making salt dough ornaments, handprints, and other sculptures, and I love that I almost always have the supplies on hand to mix up this salt dough recipe.
We almost always do a day of making salt dough ornaments in December in our home. It’s a wonderful family activity that ends with us having beautiful ornaments that will last for decades! Let me show you the exact salt dough recipe that we’ve used for years in our house—you will not be disappointed!
What ingredients do you need to make this salt dough recipe?
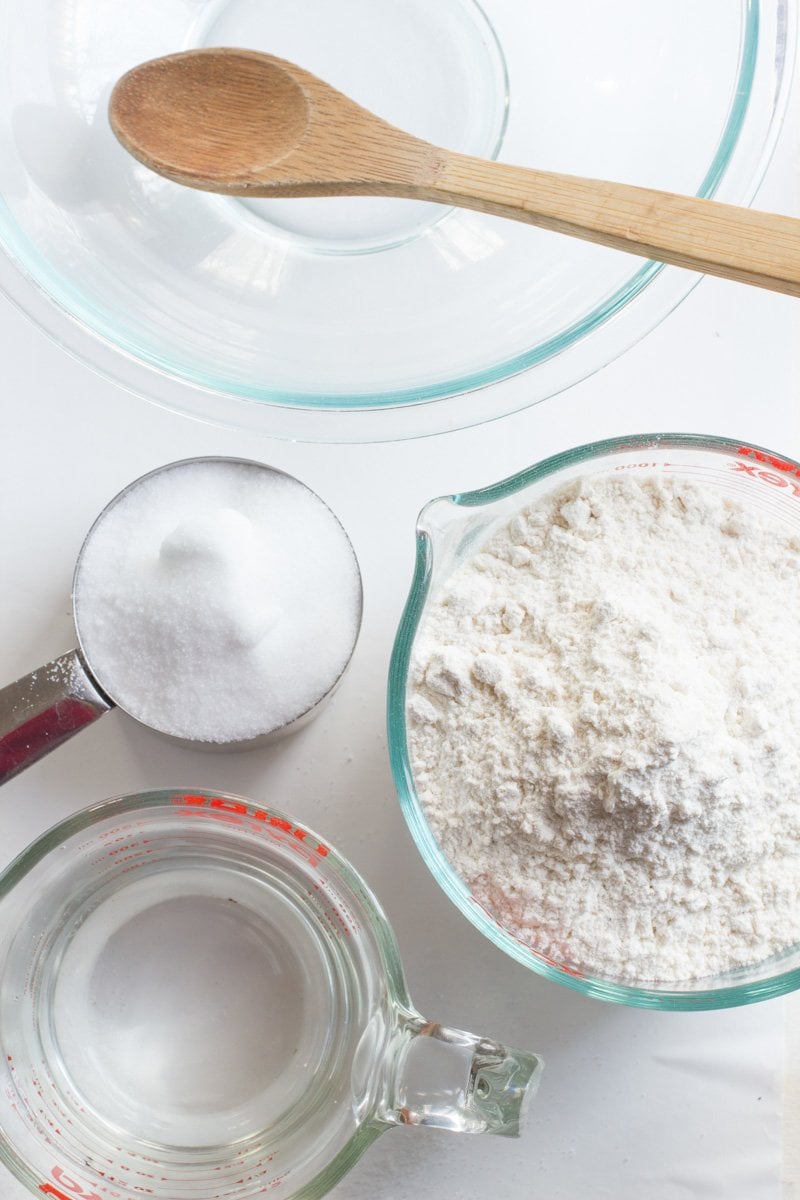
The recipe for these ornaments doesn’t get any easier. You need exactly three ingredients to get you going (scroll down to the bottom of the post for a printable version):
- All-purpose flour (4 cups)—I recommend sticking with all-purpose flour here because it’s affordable, it’s easy to work with, and it creates the most consistent color. Bleached all-purpose flour is best, but unbleached works, too. Since you aren’t ingesting this at all, go ahead and get the bargain basement generic brand flour to save yourself some cash. Save the whole wheat flour for making waffles or baking bread!
- Table salt (1 cup)—Again, make sure to add the salt to preserve these ornaments! Just like with the flour, go with the generic brand table salt here—reserve your high-end Himalayan sea salt for cooking.
- Warm water (1 1/2 cups)—The warm water helps the dough come together a little bit easier. Plus, you’ll knead the dough with your hands, and warm dough is so much more comfortable to knead in the winter!
Why do you need salt in salt dough ornaments?
The large volume of salt makes this dough not-so-tasty, which is a good thing when you have the littlest elves helping you and they are determined to take a sample taste of the craft project. While the dough isn’t toxic, it isn’t exactly recommended anyone eat it. After all, consuming raw flour has been linked to e. coli outbreaks.
Secondly, and probably most importantly, salt is an excellent preservative. If you left the salt out of the recipe below, and just mixed together water and flour, you would end up creating a near-perfect little homestead for mold to set up shop in—not so great if you want to keep these ornaments in a box in the basement for the majority of the year.

What tools will you need to make salt dough ornaments and crafts?
Chances are, you’ll have all the tools you need to make these ornaments already in your house. Here’s a general list of what we used to make the ornaments pictured here:
- Mixing bowl and large spoon
- Parchment paper
- Rolling pin
- Cookie cutters
- Forks, steel wool, rubber stamps, other textural items—optional, to add texture to the ornaments
- Straw or toothpick—for poking a hole for the ornaments to hang from
- Baking sheet
- White spray paint—optional, for giving the ornaments an even background to decorate
- Glitter, glue, paint, Mod Podge—optional, for decorating, or leave the rustic salt dough ornaments
- Polyurethane spray (like this one) or Mod Podge—optional, for extra preservation power
- Ribbon—for hanging the ornaments

How do you make salt dough?
Mixing up a batch the salt dough recipe itself couldn’t be easier! Here’s how to do it:
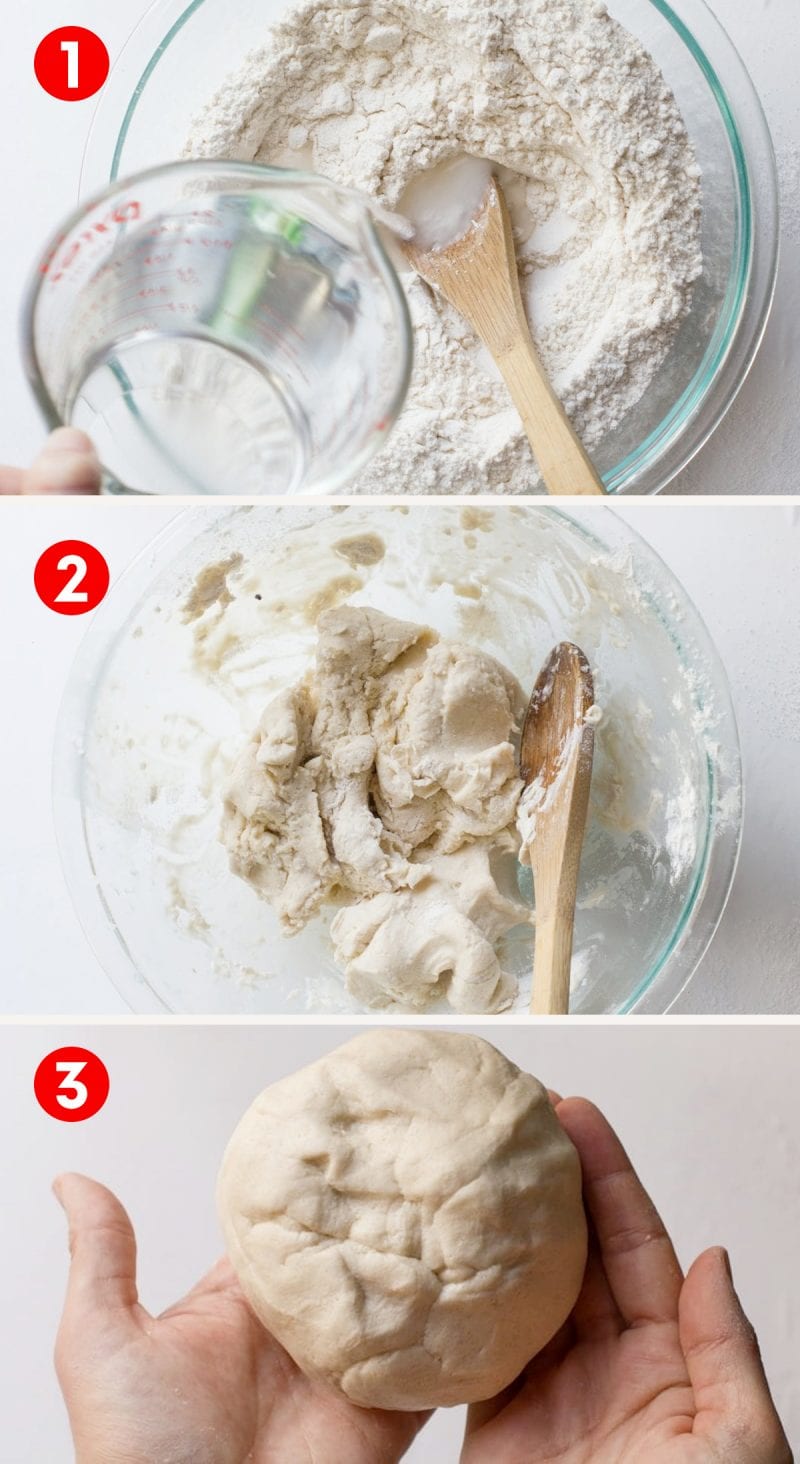
- Grab your large mixing bowl, and add in the flour and salt. Stir until well combined. Then, slowly stream in the warm water while stirring. Keep stirring until you’ve added all the water.
- You’ll get to a point where it is too hard to stir with a spoon. Put it down and use your hands to get in there and mix it well.
- Once the dough starts to come together, keep kneading with your hands for a few minutes until the dough is smooth and pliable.
Now that your salt dough is made, you can use it just like you would modeling clay to make sculptures, or you can roll it and cut it out to make ornaments or salt dough handprints.
How do you roll out and cut salt dough ornaments?
If you’ve ever rolled and cut out sugar cookies, you’ll be an expert at doing with the salt dough! Here’s the process:
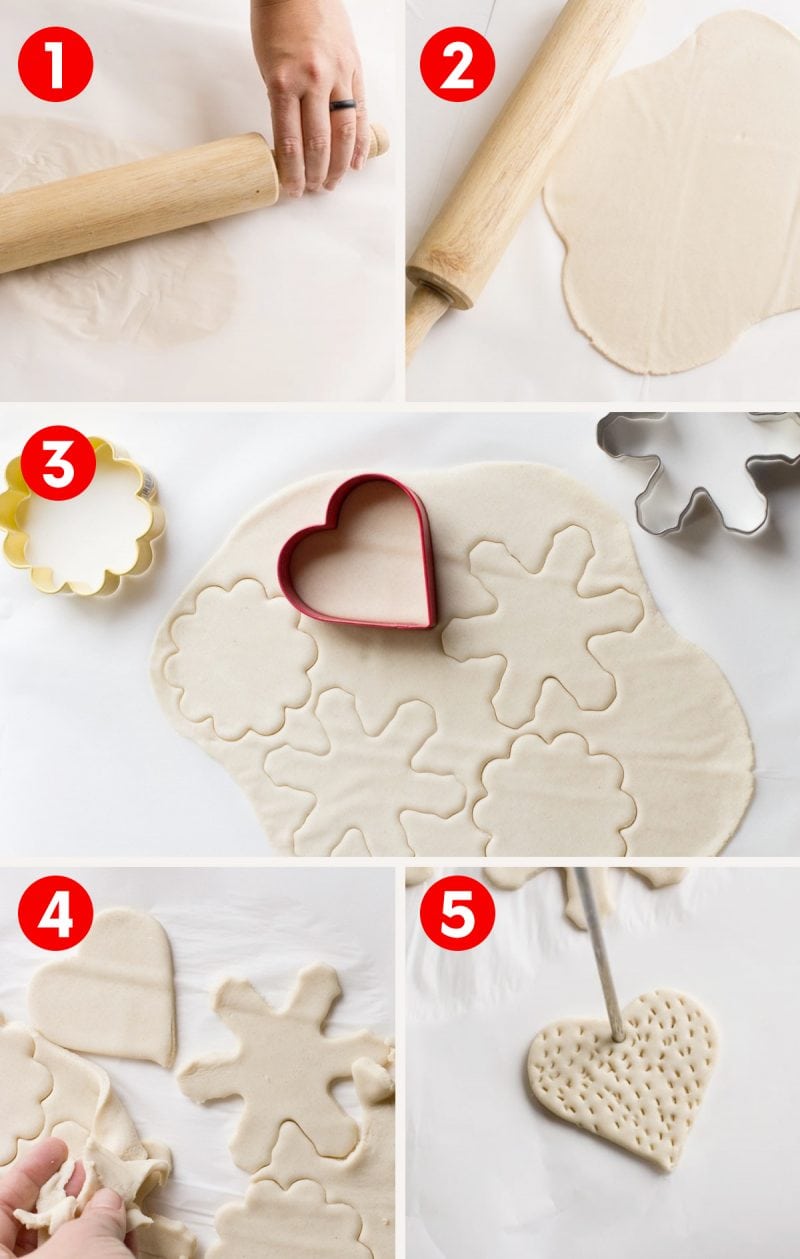
- Put down a large piece of parchment paper, and place a good-sized chunk of dough in the middle. Place another large piece of parchment on top.
- Roll out the dough until 1/8″ thick. You want to err on the side of a thinner dough. Too thick, and the ornaments tend to split or break easily because of air pockets that get trapped in the middle.
- Remove the top sheet of parchment, and then and then use cookie cutters to cut into the dough cut into the dough—do not try to remove the cut out pieces! You want those to stay on the parchment.
- When you’re finished cutting the pieces, peel away the excess dough, leaving behind the shapes on the parchment.
- Take a drinking straw, and poke a hole in the top of each ornament for a ribbon to hang from. Make sure to blow out the plug in the end of the drinking straw before you go to the next ornament. Trust me, I’ve ruined a good stainless steel straw or two by forgetting the dough inside and having it drying rock-solid inside!
Wholefully Protip
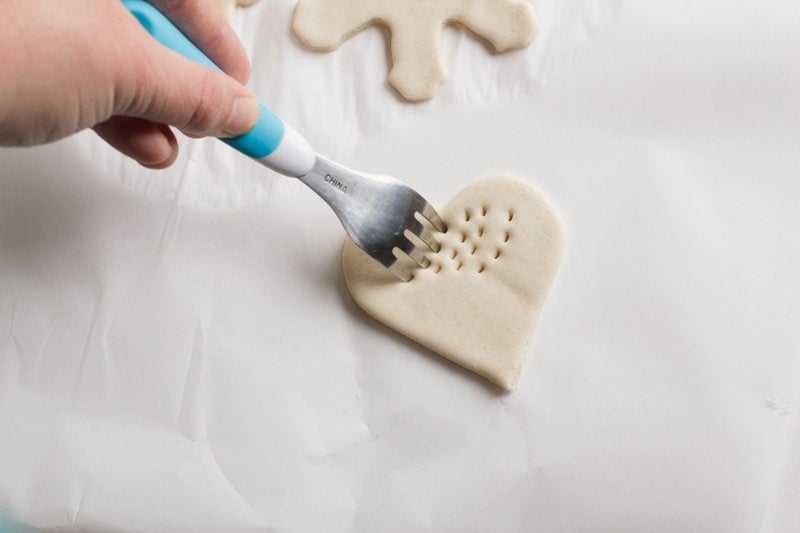
I like to put texture into my ornaments, so this is where I bring out any random object that has a fun texture—forks, straws, steel wool, other cookie cutters, scissors. There are no rules! You can also use rubber stamps.
How do you bake salt dough ornaments so they harden?
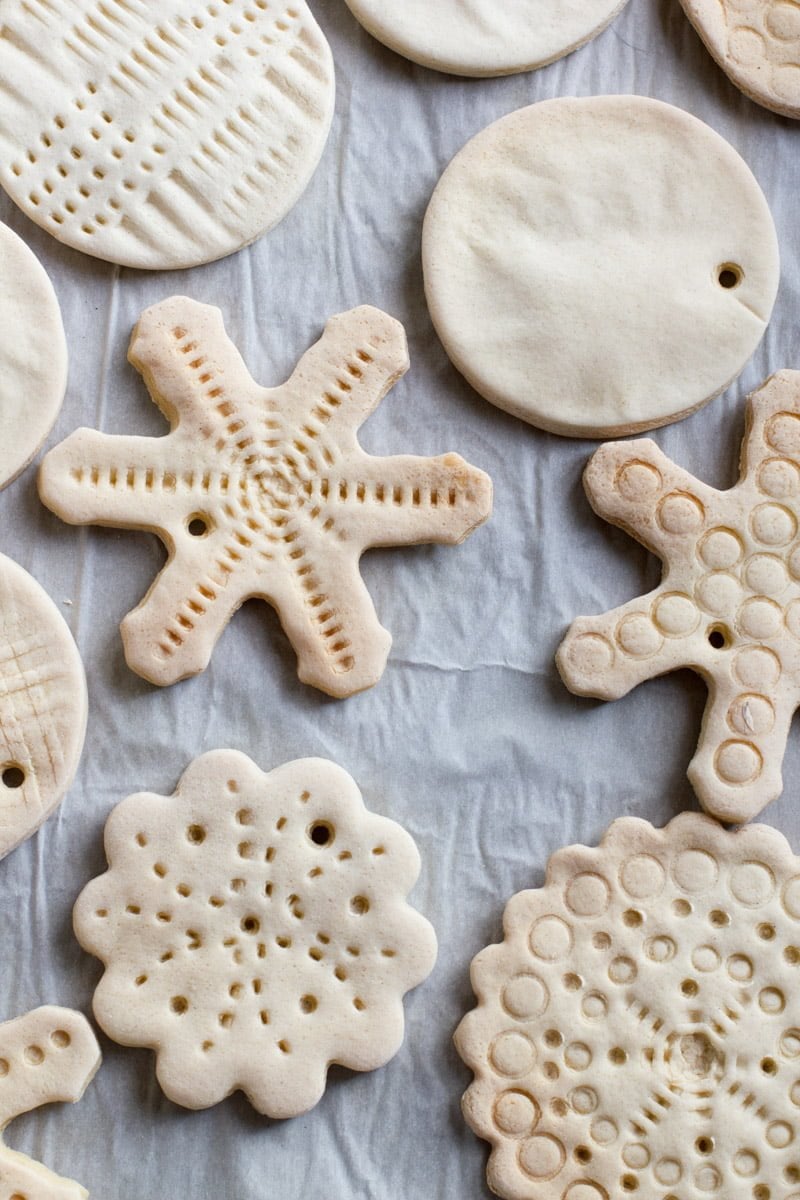
Transfer the whole parchment paper and shapes onto a baking sheet. Bake the ornaments in a 300°F oven for about an hour. This isn’t an exact science, because inevitably, your shapes won’t be 100% even in thickness. They are done when they feel hard. They are really done if they start to brown (no worries, that’s something we can fix later!). Let the ornaments cool completely before proceeding to the next step.
Do I have to bake my salt dough ornaments?
Not technically, no. You could leave the ornaments out to air dry, but it may take more time and effort. The drying process will probably take several days, depending on how thick the ornaments are and how humid it is. You’ll also need to flip the salt dough ornaments several times to keep the edges from curling. If you can, we recommend baking your salt dough creations!
Why did my salt dough puff up?
Salt dough projects tend to get puffy or bubble if the dough is too thick or if it isn’t rolled out evenly. If the ornaments have air bubbles within them, that can also cause a puffiness.
What’s the best way to paint and decorate salt dough ornaments?
Now we get to the really fun part—decorating! If you prefer the rustic, classic look of the salt dough, you can hang the ornaments as-is. But I think part of the fun of making salt dough ornaments is getting out the glitter and making a holiday mess.
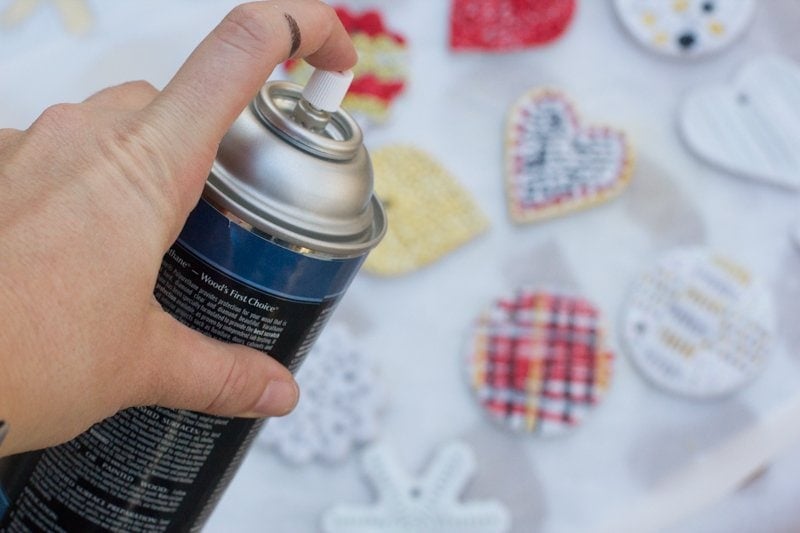
Before I start decorating, I like to mist all of my cooled ornaments with a thin coat of white spray paint. This helps cover up any irregularities in color (like when some got too brown from baking), and I think it helps the ornaments looks more like clay than hard bread. A light coating will dry to the touch in just a few minutes so you can keep decorating. Of course, this part is totally optional!
Wholefully Protip
An optional light coat of white spray paint on the ornaments gives them a nice blank canvas for decorating and painting.
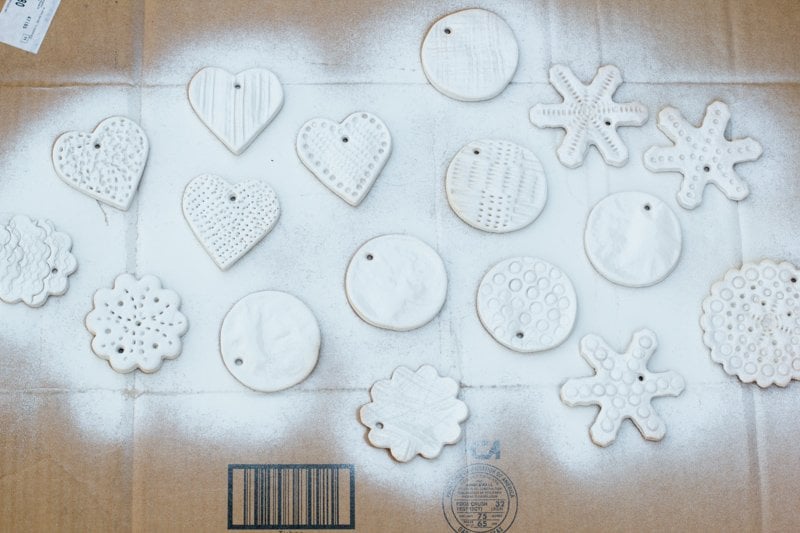
Once the spray paint is dry to the touch, I paint using acrylic paints and brushes (puffy paints would also work wonderfully). I like to use the textural spaces to help guide where I put paint—but it’s really up to you to get creative on how you want to decorate. Where I want glitter, I use Mod Podge or school glue. It’s a fun, carefree way to spend a holiday afternoon!
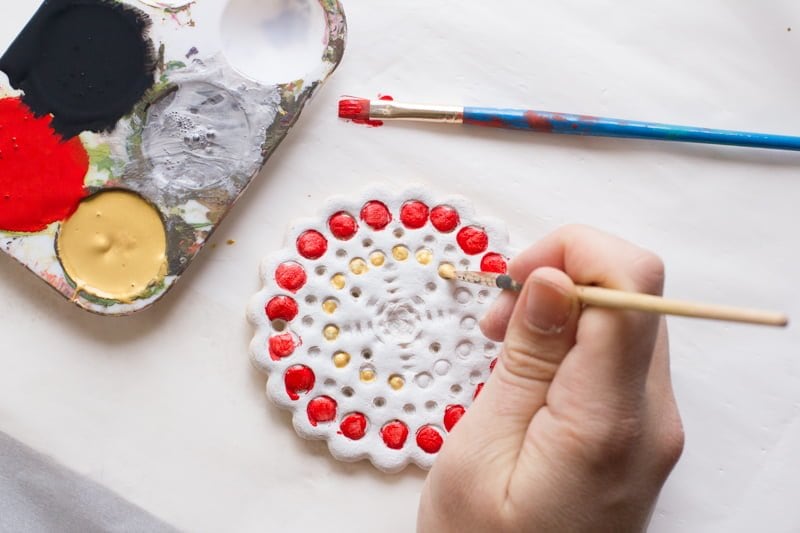
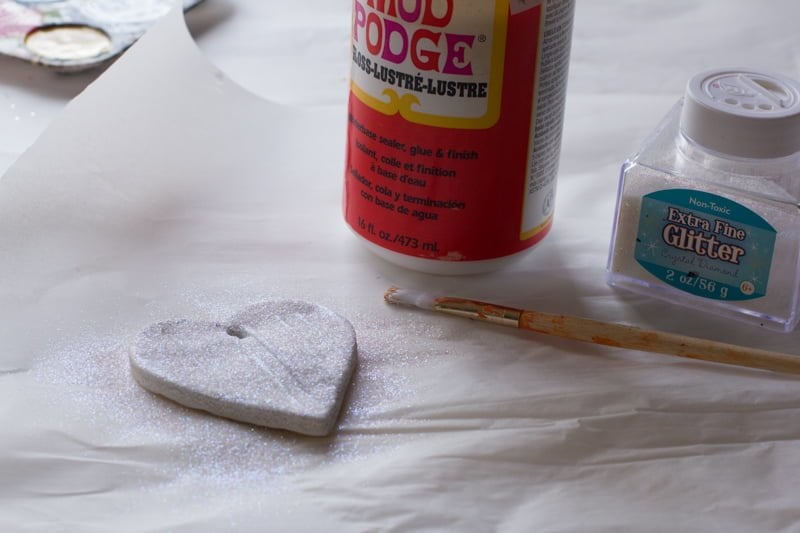
How do you protect your salt dough ornaments to make sure they last?
Once all your decorating is dry, it behooves you to seal these ornaments so they last a good, long while. While the salt does an excellent job of preserving the salt dough itself, sealing the ornaments will help keep all the decorations you just lovingly applied looking great for years to come. I like to use spray poly, but coating each one in a thin layer of Mod Podge would also do the trick. I just do one coat on each side and let it dry completely. I like to use matte or satin finish poly so the ornaments still feel like unfinished clay, but if you dig the glossy look, use semi-gloss or glossy poly or Mod Podge.
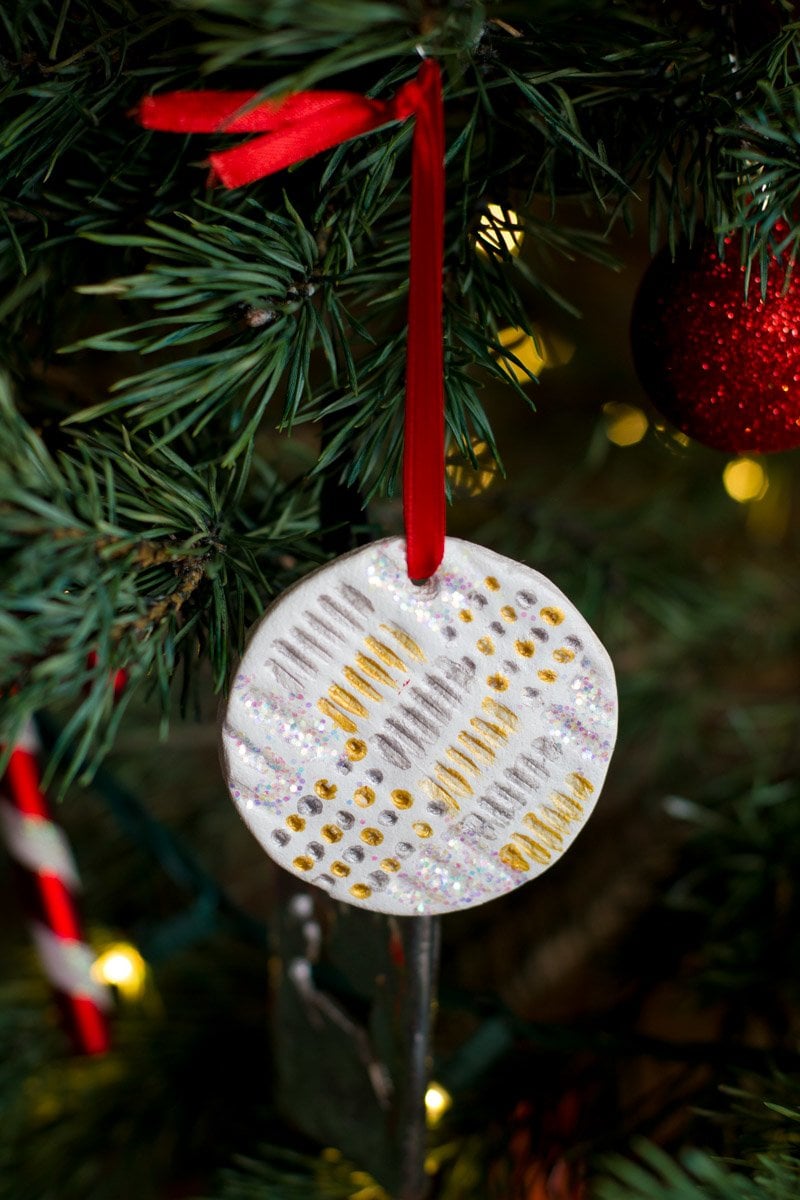
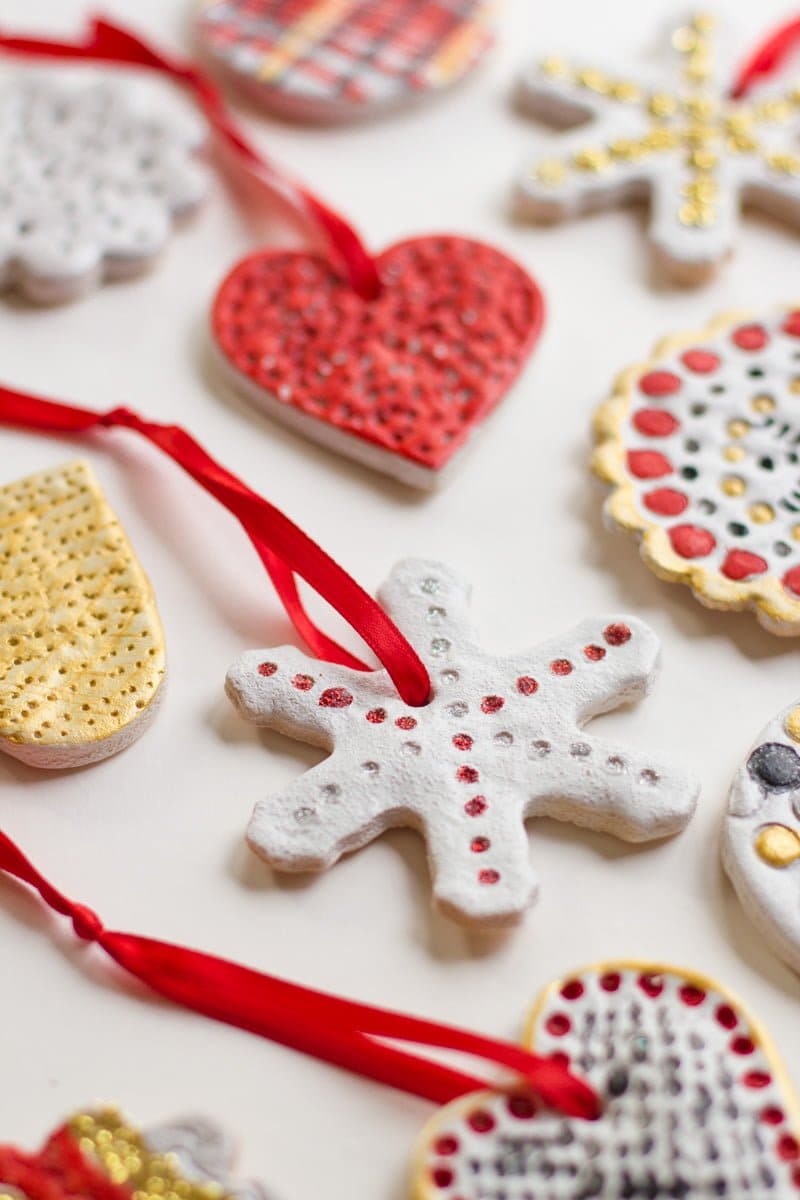
String up the ornaments using pretty ribbon or twine, and then put those beautiful new ornaments on your Christmas tree! These also make wonderful, thoughtful gifts. We tend to make either a batch of these, my Cinnamon Ornaments, or these Bird Seed Ornaments each year to give as stocking stuffers to friends and family.

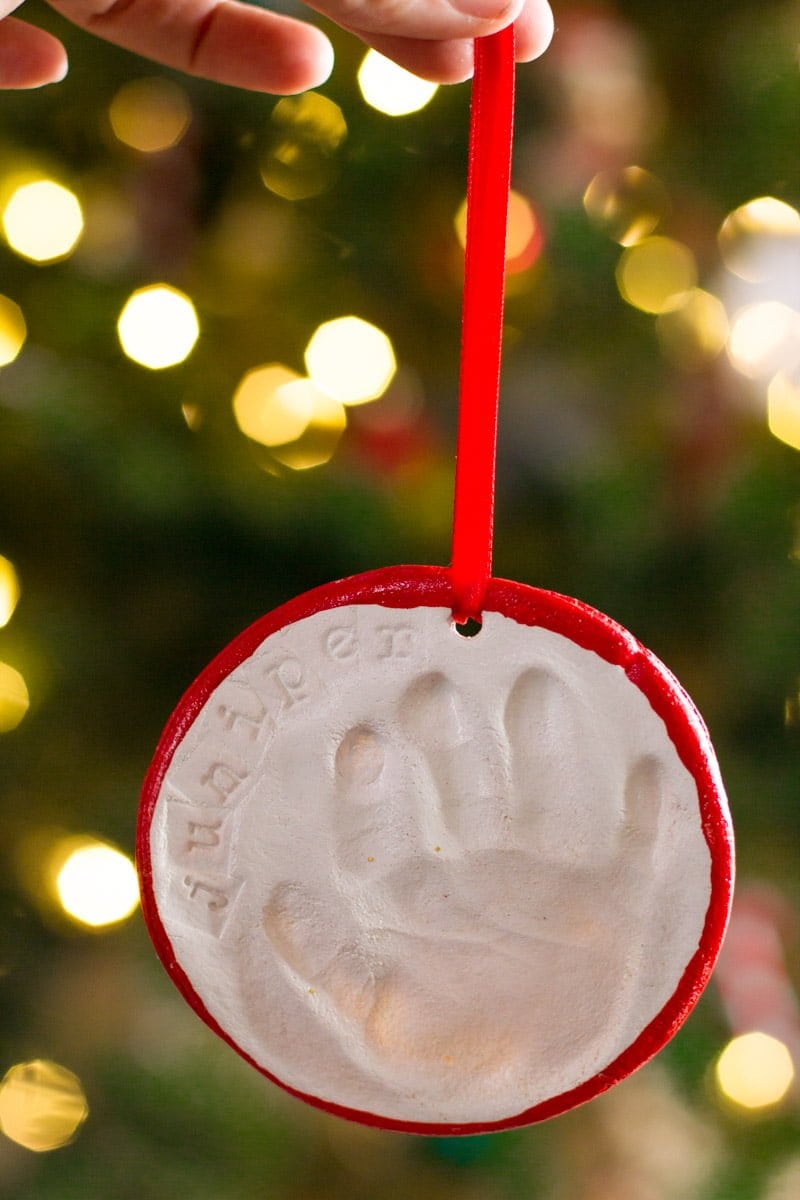
How do you make a salt dough handprint ornaments?
Salt dough handprint ornaments (or pawprints!) are a great way to mark major milestones in your life! Here’s how to do it:
- Roll out the dough as directed above, making it slightly thicker than you would for regular ornaments.
- Evenly press the hand or foot in the dough.
- Cut around the handprint or footprint using the rim of a bowl or glass. You might be tempted to do the other way around (cut out the shape first, then get the handprint), but trust me on this one—wiggly, squirmy babies do not know how to center their hands into a shape! You’re better off having a large piece of salt dough to “catch” the print, and then cutting out around it.
- Proceed with the baking, decorating, and sealing steps.
This is a salt dough handprint ornament we made to mark our daughter’s first Christmas. Her hand was so tiny. *sniff* *sniff*
Wholefully Protip
I recommend making more than one of precious handprint ornaments! Salt dough is incredibly affordable, so you can make lots of “copies” for just pennies more. While salt dough preserves well, it is still breakable.
We’ve included a printable version of this recipe for easy reference. We have a copy printed out and stashed with our holiday craft box, so it’s easy to access every year! Happy crafting.

Salt Dough Recipe for Ornaments, Handprints, and Crafting
Salt dough is a fun craft to do with the kids! Mix up a batch of our salt dough recipe for making Christmas ornaments, keepsake handprints, or other salt dough crafts.
PLEASE NOTE: A number of readers have had issues with their ornaments puffing and losing their shape. We haven't been able to replicate this in our own kitchens yet, but if you're concerned, we recommend lowering the oven temperature to 200°F and leaving them in for longer.
Ingredients
- 4 cups all-purpose flour
- 1 cup table salt
- 1 1/2 cups warm water
- Glitter, paint, and ribbon, for decoration
- Polyurethane spray, for preservation
Instructions
To Make Dough
- In a large bowl, whisk together the flour and salt. Slowly stream in the water while stirring until it comes together. Finish mixing together with hands. Knead until dough is soft, about five minutes.
To Bake Ornaments
- Preheat oven to 300°F. Place half of the dough between two large pieces of parchment paper. Roll out until 1/8" thick. Remove the top sheet of parchment.
- Using cookie cutters, cut shapes (leaving them on the parchment). Peel away the excess dough. Transfer the parchment with shapes to a baking sheet.
- Using a straw or toothpick, poke a hole for ribbon or an ornament hanger. Bake in preheated oven for 1 hour, or until hard.
- Once cooled, decorate using glitter and paint. To make sure the ornaments last a long time (I have one from 30 years ago!), spray with a light coat of polyurethane spray. Thread on a ribbon and hang on tree.
Looking for more fun holiday crafts and gifts? Check these out:
- Cinnamon Ornaments. Looking for another easy holiday ornament craft? You can’t beat our cinnamon ornaments. They smell great and are a blast to make with kids!
- Bird Seed Ornaments. These simple handmade ornaments will bring all the birds to your yard!
- Soup Mixes in a Jar. These affordable gifts in a jar are easy to pull together and make a thoughtful teacher’s gifts, hostess gifts, or gifts for friends and family.
- M&M Cookie Mix in Jar. We gave these M&M Cookie Mixes as gifts a few years back, and everyone absolutely loved them! The cookies that are made from the mix are the BEST.
- Homemade Hot Sauce. Give the gift of some heat! We’ll teach you just how easy it is to make your own homemade hot sauce.

